Sunday, June 30, 2024

Forgotten Battle 5

Welcome back viewers

This month's Forgotten Battle is...

The Battle of Attu


Intro

The battle of Attu was fought in the Aleutian Islands from May 11 to May 30, 1943. It was fought between the American Army and the Japanese Army. It was the largest and bloodiest land battle to be fought on American soil during World War II.

Part I

Six months after the Attack on Pearl Harbor, the Japanese Army sent a couple battalions to occupy two of the Aleutian Islands. On June 3, 86 Japanese aircraft launched an attack on Alaska's, Dutch Harbor. The attack severely damaged the American military base and enabled the Japanese to move ships into the area. Later that month, several thousand Japanese soldiers landed unopposed on the islands of Attu and Kiska and built fortifications on them.

By the year 1943, the tide of the War in the Pacific had turned in favor of the United States. The Japanese Navy had suffered a devastating defeat at the Battle of Midway. And the Guadalcanal Campaign had ended in a hard-fought victory for the Americans. This victory was the first major success of the Allied island hopping strategy across the Pacific. Further attacks on other strategic islands were immediately planned; among them were the Aleutian Islands, Attu and Kiska.

Part II

Although the Japanese garrison did not present a major threat to mainland America, it was seen as a threat to those living in Alaska. Many generals feared that the Japanese could use the islands as airbases to threaten the Americans stationed there and interfere in ship movements from that territory. Also, they were highly irritated that a piece of American territory was under Japanese occupation. After several months of consideration, they decided to launch Operation Landcrab and retake the Aleutian Islands occupied by Japan. The first target was, Attu. 

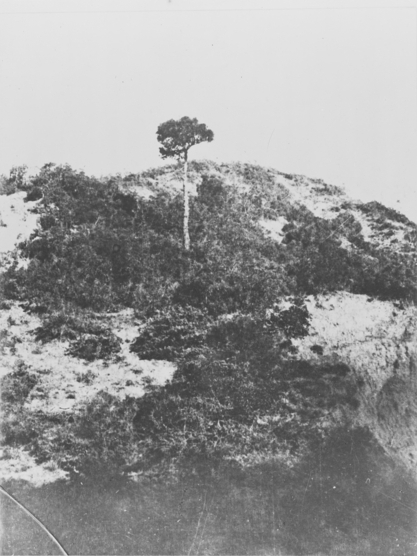
Attu is an uninhabited volcanic island with only a few trees. It frequently has 100-mile-an-hour gusts and rain storms. The Japanese garrison on the island numbered 2,650 soldiers from the IJA 2nd District under the command of, Colonel Yasuyo Yamasaki. After taking control of Attu, Yamasaki ordered his soldiers dig in on the high ground away from the beaches. Knowing that his army was severely outnumbered and outgunned, Yamasaki was prepared to give the last full measure.

It was decided that the assault of Attu would be carried out by the American 7th Infantry Division. Spearheading the attack would be the 32nd Infantry Regiment (aka: the Buccaneers). Although they had not been trained for winter warfare, this attack was to be their baptism of fire. Very few of them had any idea of what they were about to face.

Part III

The assault began on May 11, just after 7 AM. In just over an hour, the first wave had all landed without encountering any resistance. This was due in part to a heavy fog that covered the beaches and obscured the Americans from the Japanese defenders. Once the Americans began moving off the beaches, the battle began.


The Americans had superior numbers and better equipment. However, their advance was hampered by bad weather and freezing temperatures. As a result, many soldiers suffered trench foot and frostbite. This coupled with highly fortified Japanese positions in the island's tundra, caused them to suffer heavier casualties than they anticipated. As they moved further inland, the fighting only got worse. In the thick of it, was Private Joseph (Joe) Pantillion Martinez.

Originally from Taos, New Mexico, Joe was only 22 years old. He had been assigned to Company K of the 32nd Infantry Regiment. On May 25, Martinez and his regiment were attempting to capture a mountain pass called, Fish Hook Ridge. This position was one of the strongest defenses in the Japanese lines. Behind this pass was Chichagof Harbor, the Japanese last line of defense. With his regiment pinned down by heavy machine-gun fire, Martinez decided to take the initiative. He crawled away from his comrades and began to climb the pass toward the Japanese position. After reaching it, he killed five of the machine-gunners. Unfortunately, Martinez received a lethal wound to his head while charging the last Japanese foxhole on Fish Hook Ridge (he would die the next day). 

After capturing Fish Hook Ridge, the Americans finally began advancing on Chichagof Harbor. On May 28, the Japanese prepared to launch a suicidal counterattack (a banzai charge). Colonel Yamasaki penned a final letter to his wife, Shigeko. It read, "We have been married for more than 30 years and I would like to thank you for all the good time we could spend together. You have been an excellent wife to me and a gentle mother to our children. I will always think back of that time with much pleasure". On May 29, what remained of the Japanese garrison launched its banzai charge. They managed to break through the first American line and vicious hand-to-hand fighting followed. However, the Americans quickly recovered and annihilated the Japanese attack with overwhelming firepower. By the next day, the battle of Attu was finally over.

Epilogue

The Americans had emerged victorious in the battle for Attu. However, the 19-day operation had cost both armies dearly. The American casualties were 548 killed, 1,148 wounded, and more than 1,800 frostbitten and sick. Of the Japanese garrison of 2,600, only 28 survived to be taken prisoner. The rest (including Colonel Yamasaki) all died fighting or committed suicide. As a percentage of the number of soldiers involved, this was the second-deadliest battle fought between the Americans and the Japanese in the Pacific (with only Iwo Jima being worse).

For his valor on Attu, Private Joe Martinez was posthumously awarded the Congressional Medal of Honor. He would be the only American servicemen to receive the medal for this battle. Three months later, the Americans prepared to invade the Aleutian island, Kiska. Upon landing on the beaches however, they found the island completely devoid of enemy troops (the Japanese had evacuated the garrison two weeks earlier). This concluded the Aleutian Islands campaign of World War II.

The battle of Attu was the last major combat action of the Aleutian Islands campaign. All further actions against the Japanese would occur in the South Pacific Ocean. The American victory at Attu was largely overshadowed by their campaigns in the Solomon Islands and New Guinea. When World War II was over, the Americans abandoned Attu as they had little use for it. Today, the island's only residents are its wildlife. And they only hint of the terrible battle that was fought in May of 1943, are a few small monuments to the fallen of both armies.

https://www.army.mil/article/256615/7id_and_the_invasion_of_attu

https://www.history.com/topics/world-war-ii/battle-of-attu

https://www.washingtonpost.com/news/retropolis/wp/2018/05/24/thousands-of-japanese-soldiers-fought-the-only-wwii-battle-on-u-s-soil-just-28-survived/

https://ww2db.com/person_bio.php?person_id=168

https://evergreenpodcasts.com/medal-of-honor/pvt-joe-p-martinez-fighting-an-uphill-battle

https://www.nps.gov/articles/000/battle-of-attu-60-years.htm

Saturday, June 1, 2024

Forgotten Battle 4

 Welcome back viewers

This month's forgotten battle is...

The Battle of Lone Pine


Intro

The Battle of Lone Pine occurred in August 1915, in present-day Turkey. It was part of the Gallipoli Campaign of World War I. It was fought between the Anzacs (Australians and New Zealanders) of the British Empire and Turkish soldiers of the Ottoman Empire. It would be one of the very few Allied victories during one most disastrous campaigns of World War I.

Part I

In 1915, the war on the Western Front had reached a bitter stalemate. Both sides had become bogged down in Northern France. Fierce fighting was waged around the Marne River and the city of Ypres in Southern Belgium. The Allies decided to launch an offensive against the Ottoman Empire (Turkey). At the urging of the First Lord of the Admiralty (Winston Churchill), the Allies sought to weaken the Turks by taking control of the Ottoman straits. These are the two waterways that are considered the dividing lines between Europe and Asia. The two straits are called the Dardanelles (which connects to the Aegean Sea) and the Bosporus (which connects to the Black Sea). 

If the Allies could take control of the Ottoman straits, then the Ottoman capital of Istanbul would be vulnerable to attack. This would also open a supply line between the Western Allies and the Russian Empire. In order to capture the straits, the Allies first needed to capture the Turkish peninsula of Gallipoli. In April, thousands of British, French, and Anzac soldiers landed at two beaches around Gallipoli (Cape Helles and Anzac Cove). They expected to encounter light resistance. 

Instead, the British and Anzacs were confronted by a highly concentrated array of Turkish defenses. To make matters worse, the Royal Navy found the straits to be heavily mined and rigged with coastal defenses. These defenses turned the Gallipoli campaign into a 10 month stalemate with horrific casualties on both sides. And the Allies had found themselves in a situation very similar to what was happening in Western Europe.

Part II

Undeterred by their heavy casualties and minimal progress, the Allied commanders refused to consider the possibility of withdrawal and ordered multiple attacks to be launched against the Turkish lines. The Anzacs were tasked with launching a diversionary attack on a rise known as, "400 Plateau". Its nickname was, Lone Pine (after a solitary Turkish pine that had withstood the bombardment).


Lone Pine was targeted due to its location directly above the Anzac's landing beach (Anzac Cove). It was also meant to lure Turkish soldiers away from British soldiers landing at Suvla Bay. It was also meant to distract the Turks from an Anzac assault on the Sari Bair ranges. If all went according plan, the Allies could finally break through the Turkish lines and advance through Gallipoli. The offensive began on August 6.

Part III

The assault on Lone Pine began just after 3 PM with a massive barrage of artillery from the Royal Navy. After a 90 minute bombardment, the first wave of Anzac infantry (1,800 men) emerged from their trenches and advanced on Lone Pine. To the surprise of many, they encountered relatively light resistance as they approached the Turkish trench. When they reached it however, the Turks opened fire on them. The Anzacs were quickly pinned down under a withering volley of bullets. They then noticed that Turkish fortifications were roofed with pine logs that impeded access (arial reconnoissance had failed to spot these).

The second and third waves of Anzac infantry then also advanced on Lone Pine. While the first wave tried to clear fortifications with grenades, they began flanking the Turks by attacking the communications and support trenches. By doing this, they were able to gain access to the main trenches. From there, the fighting was hand to hand. After less than an hour of fighting, the Anzacs successfully captured the first set of Turkish trenches. Some of the Anzacs then advanced 20m behind Turkish lines to a position called, "the Cup". At nightfall of August 6, they dug in and prepared for an inevitable counter-attack. They didn't have long to wait.

Just hours into the night, the Turks launched their counter-attack. To the surprise of the Anzacs, it did not come from no-man's-land (land between enemy trenches) but from underground. Prior to the invasion, the Turks had dug a maze of tunnels under their trenches. This had enabled them to evade damage from the Allied bombardment and continually reinforce their garrisons around Gallipoli. 

For the next three days and nights, the Turks launched numerous counter-attacks attempting to retake the Anzac position at Lone Pine. Against all odds, the latter was able to hold on. Their own engineers dug a safe passage across no-man's-land which enabled reinforcements and supplies to enter the captured positions without being exposed to enemy fire. In spite of their best efforts, the Turks were unable to drive the Anzacs out from Lone Pine. They ceased their counter-attacks on August 10.

Epilogue

The battle of Lone Pine had ended in an unexpected victory for the Anzacs. They had successfully penetrated the Turkish lines and held their positions against repeated counter-attacks. The casualties for the battle had been quite heavy. The Anzacs had suffered around 2,200 casualties while the Turks had lost between 5,000 to 7,000. Sadly, the Anzac victory at Lone Pine was short-lived.

Although the diversionary assault on the Turkish lines had succeeded in taking its objective, the Allies failed to exploit it. The main Anzac attack at the Turkish position at Chunuk Bair (the real target) initially captured it. But the British commander (Frederick Stopford) who landed at Suvla Bay (and was supposed to reinforce the Anzacs) failed to move his soldiers off the beach. Without aid from British soldiers, the Anzacs at Chunuk Bair were unable to further advance and were left open to a Turkish counter-attack. 

By August 10, the Turks had realized that the Anzac attack on Lone Pine was a diversion and quickly rushed reinforcements to Chunuk Bair. In a massive counter-attack, they drove the Anzacs off Chunuk Bair and regained all of the lost ground there. The British and Anzac assaults on other positions also failed miserably. For the Allies, the failed August offensive was the final straw. The Gallipoli Campaign was declared a failure and they began withdrawing their soldiers. In December 1915, the Anzacs at Lone Pine were among the last to be withdrawn. After 10 months of horrific fighting, the Gallipoli Campaign was finally over.

After the end of World War I, Anzac and Turkish veterans (with permission from the new Turkish government) returned to Gallipoli and constructed monuments for those who died during the campaign. At the original battle site of Lone Pine is a cemetery that was constructed for the Anzac and British soldiers who died there. During the fighting for Lone Pine, its namesake (the lone Turkish pine tree) had been completely destroyed. In the 1920s however, a stone pine tree was planted at the cemetery. It remains there today as a sad reminder of the terrible cost of the battle for Lone Pine.

https://www.dva.gov.au/media/media-backgrounders/first-world-war-battle-lone-pine-1915


https://www.awm.gov.au/wartime/34/article

https://www.awmlondon.gov.au/battles/lone-pine

https://www.battlefieldtourspecialists.com.au/the-attack-at-lone-pine-gallipoli/

https://web.archive.org/web/20080725093918/http://www.diggerhistory2.info/graveyards/pages/anzac/anzac08-lone-pine-m.htm